So on Saturday, we painted the radiator. I like to think we rescued it from utter shame and humiliation, restoring it to its former glory. The crazy thing is that it only took us half an hour to complete the project (i.e. this should have been done a long time ago). We started the project with a trip to my favorite store, Menards. Hubs decided spray paint was the right product to use verses regular paint because it could get into all of the nooks and crannies that would be hard to reach with a brush. We settled on semi-gloss spray paint in tan. I chose tan because I think it will complement the mocha walls nicely (when we get the walls painted).
After we brought the 2 cans of spray paint home (so far, we’ve only used one can), I quickly washed the radiator off and dried it with an old rag. Then, Hubby spread some of his painters plastic over the wood floor and used a flattened cardboard box to protect the wood trim. During the spraying process, we were not worried about getting spray paint on the walls because they need to be skim coated with mud anyway (to get rid of the sponge marks from the red polka dots). Hubby did all of the spraying and I held the spotlight for him, so that he could see where more coverage was needed.
In the beginning, I was worried about the heat given off by the radiator; it was definitely working hard because it was freezing outside. I was concerned that the heat would affect the painting process or that it could be dangerous (I didn’t want to blow up the house!), but Hubs said it would be fine and it was. Also, I should mention that the radiator doesn’t get warm enough to need the special heat-safe spray paint that we examined at Menards (it is for objects that reach very high temperatures like grills).
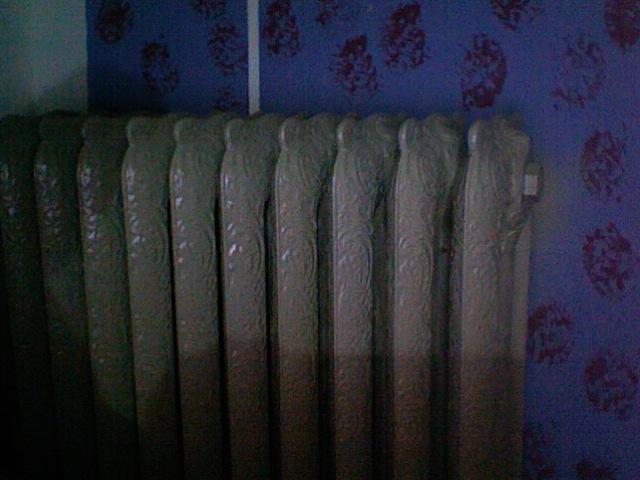
When Hubs finished the painting, the radiator gleamed like new. The finished product looks amazing. In fact, I hadn’t even realized that there is fancy scrollwork on the body of the radiator because it was hidden by the hideous color scheme. Bonus! Now, we are talking about giving the bathroom radiator a once over just to cover up some white marks I made on it when I was priming the wood paneling. Until then, enjoy the before and after pics from the master bedroom radiator project (you'll have to forgive the after pics because I took them with my laptop):


That looks gorgeous!!
ReplyDelete